

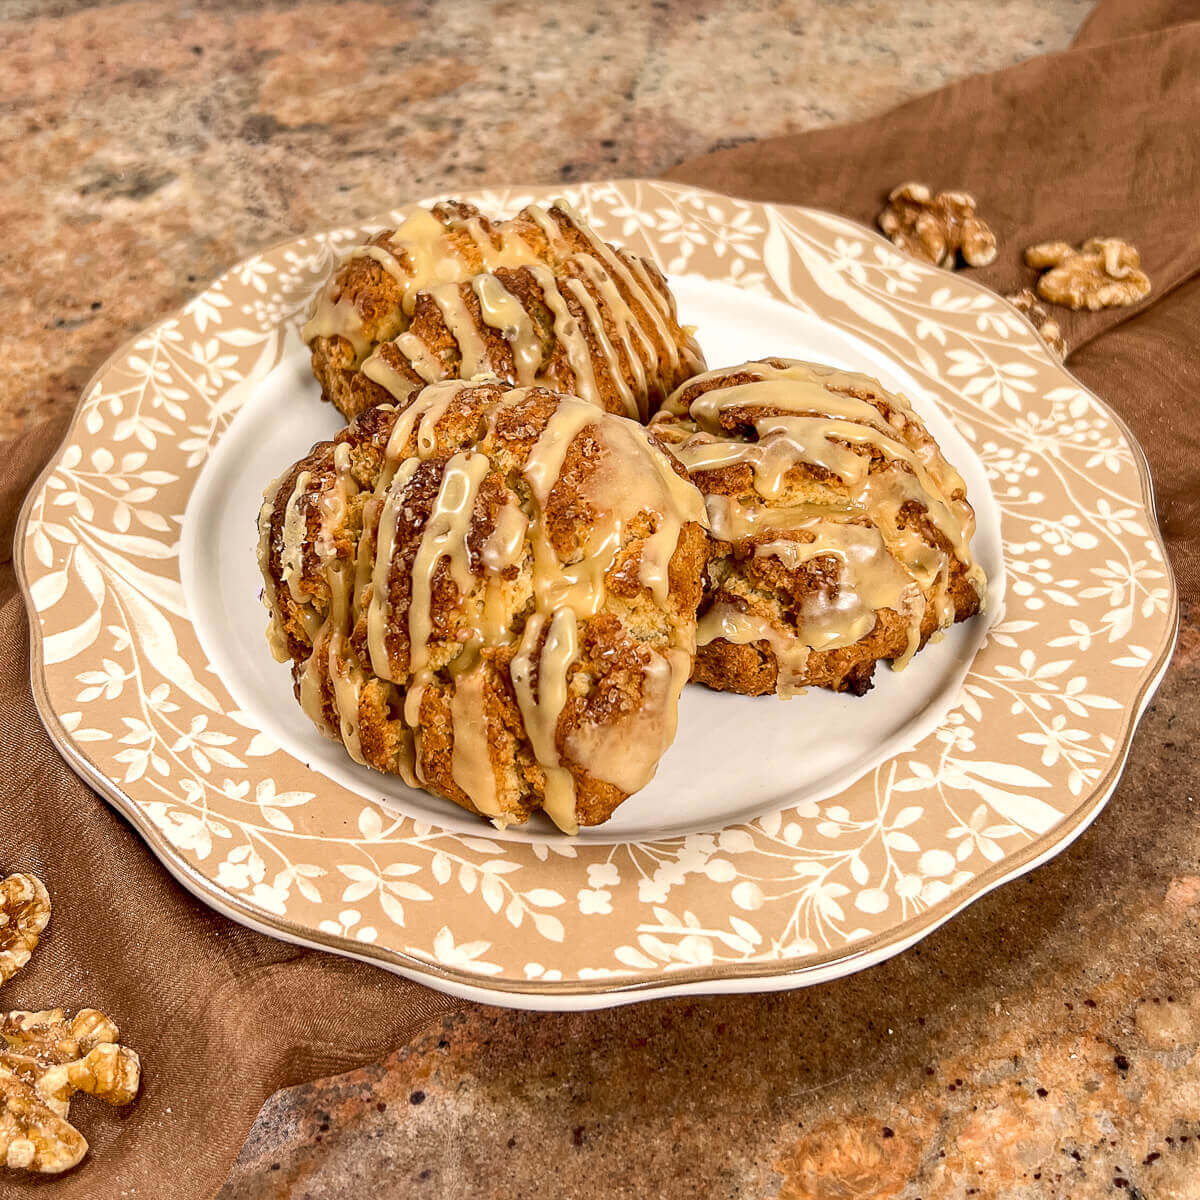
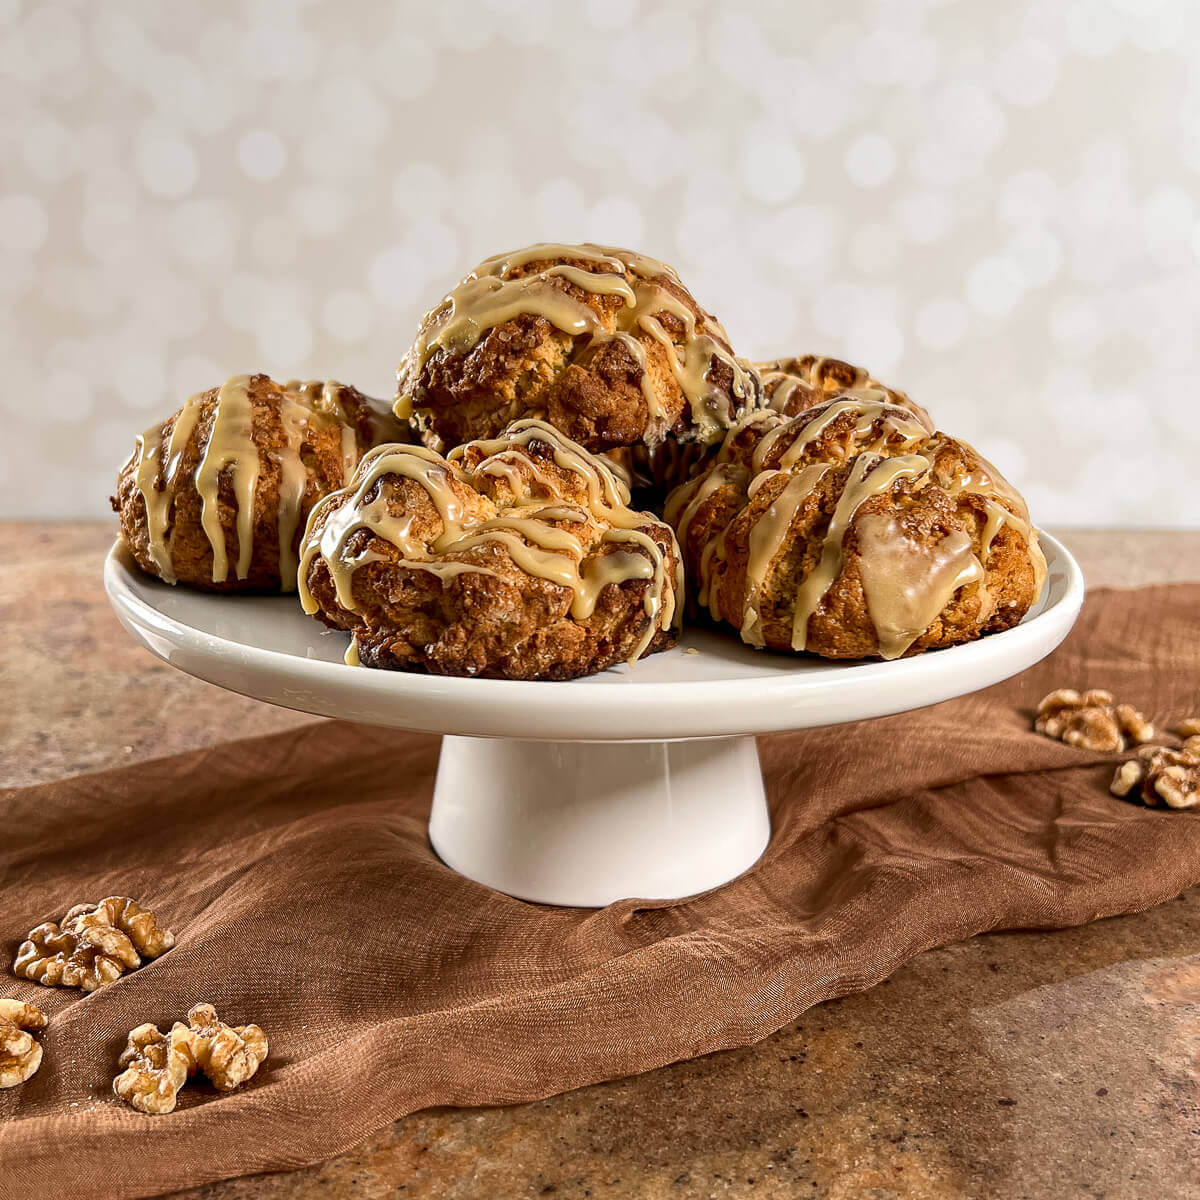
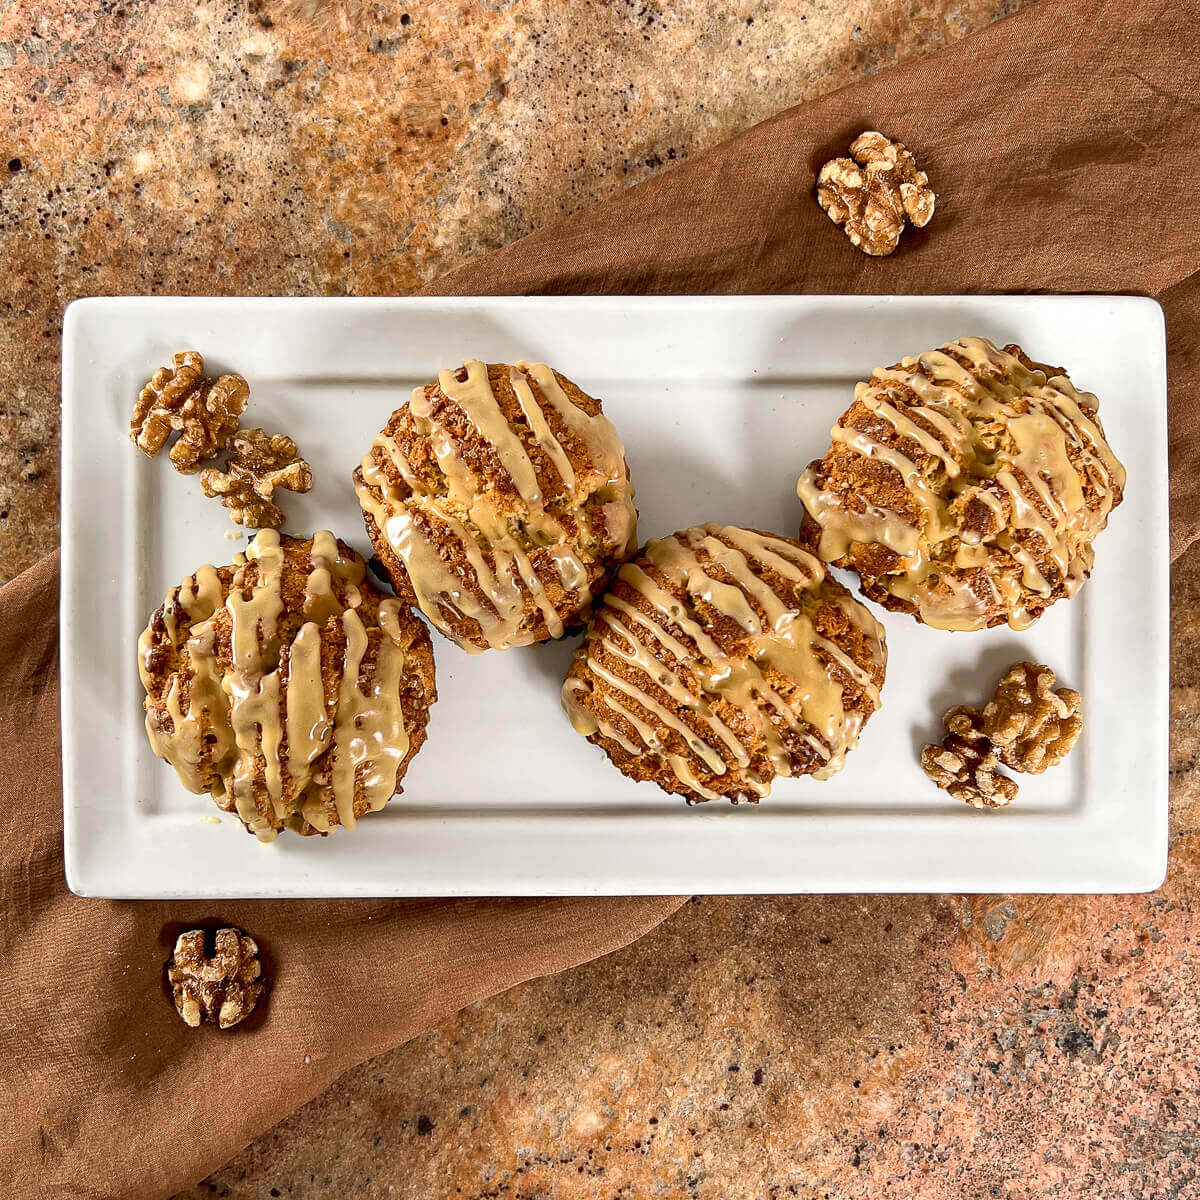
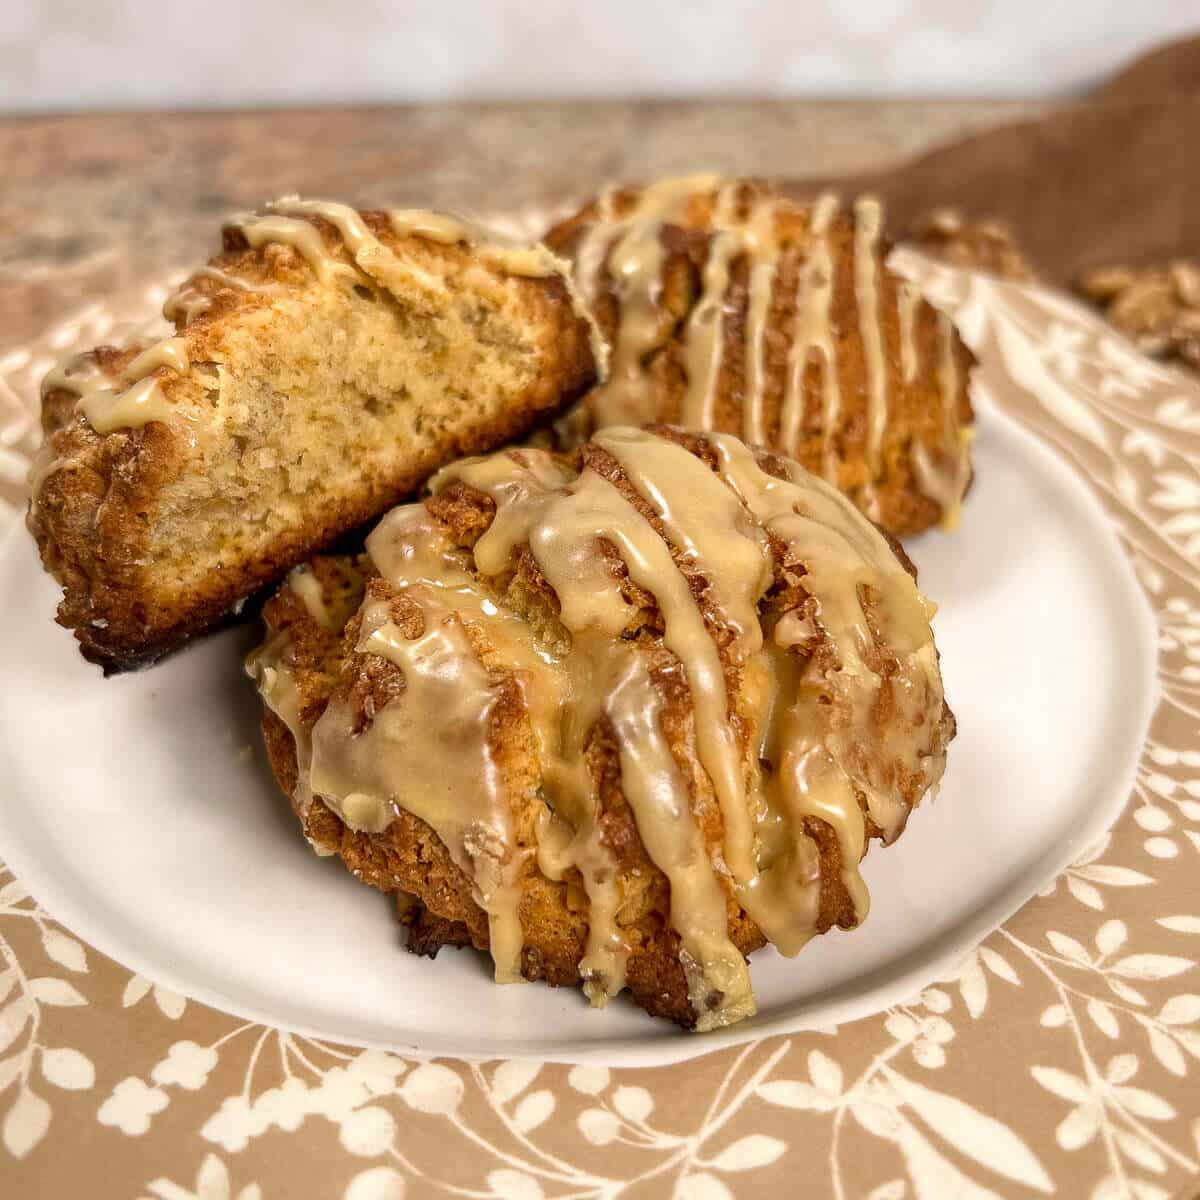
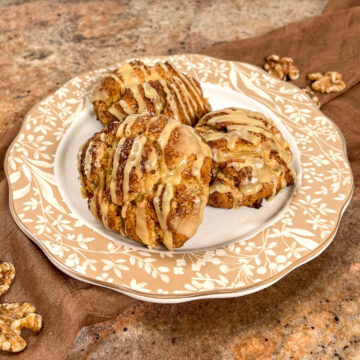
These Glazed Maple Walnut Scones are tender and buttery with rich maple flavor, crunchy walnuts, and a sweet maple glaze. They're easy drop scones - just scoop the dough onto the pan and bake. Perfect for a cozy Fall breakfast or afternoon treat!
Jump to:
- Quick Recipe Summary ✨
- Why this recipe works
- Recipe Ingredients
- What maple syrup is the best grade for baking?
- How to make maple scones
- Making scones in the food processor
- Storage and make-ahead instructions
- Troubleshooting tips
- Questions asked and answered
- More biscuit and scone recipes to try
- Recipe
- Comments
Quick Recipe Summary ✨
Glazed Maple Walnut Scones: Tender, buttery drop scones flavored with pure maple syrup and brown sugar, studded with crunchy walnuts, and finished with a sweet maple glaze.
Easy drop-scone method: No rolling, cutting, or shaping needed - simply scoop the dough directly onto the baking pan.
Big maple flavor: Robust pure maple syrup flavors both the scones and glaze for maple flavor in every bite.
Two mixing methods: Make the dough by hand or use a food processor for quick, easy mixing.
Prep Time: 30 minutes • Bake Time: 18 to 23 minutes • Total Time: About 1 hour 10 minutes, including cooling
Difficulty Level: ⭐⭐ Easy. Keep the butter cold and don't overmix the dough for tender, buttery scones.
Yield: 12 scones • Freezer-friendly: Up to 3 months • Make-ahead: Freeze the unbaked scooped scones and bake them straight from frozen.
👉 Follow the detailed instructions and troubleshooting tips below for tender maple walnut scones with plenty of maple flavor and crunchy walnuts every time.
SUMMARIZE & SAVE THIS CONTENT ON
Why this recipe works
- Cold butter: Creates little pockets of steam as the scones bake for a tender texture
- Brown sugar: Adds moisture and a subtle caramel-molasses note that complements the maple
- Medium-chopped walnuts: Give you nutty crunch without making the scones difficult to scoop
- Cream-brushed tops: Help the scones brown while coarse sugar adds a little extra crunch
These Maple Walnut Scones are a Fall-inspired riff on my cream scones, combining earthy walnuts with the rich sweetness of pure maple syrup. Unlike traditional wedge-shaped scones, they're scooped directly onto the baking pan for an easy, rustic look.
They're just right for breakfast, brunch, or an afternoon snack with a steaming cup of tea. Add a fire, a book, and a dog at my feet and I'm set... (hey, come back to us!)
If you're a maple lover looking for more recipes featuring maple syrup, check out these Maple Walnut Bourbon Blondies and Homemade Maple Pudding. These maple syrup desserts will make your taste buds do a happy dance!
⭐⭐⭐⭐⭐
Delicious!
- Ella
Recipe Ingredients
You'll need the following ingredients to make this maple scone recipe:

Ingredient Notes
Maple syrup: I use Grade A Dark, Robust Taste maple syrup because its stronger maple flavor holds up well in baking. See below for more about maple syrup grades and which one to choose.
Butter: How you cut up your butter isn't as important as keeping it cold. Generally I'll grate frozen butter on a box grater before cutting it into the flour mixture. You can also cut chilled butter into small ½-inch cubes. Either way, make sure the butter is well chilled before cutting it into the flour mixture.
Brown sugar: Using brown sugar instead of granulated sugar adds a molasses undertone and increases the scone's moisture.
Walnuts: Raw walnut halves are there to add a crunchy texture, but the real star of the show is maple syrup.
Baking powder: This maple scone recipe uses 1 tablespoon of baking powder to ensure you'll have tall, tender scones. Don't substitute baking soda as the scones will have a metallic taste to them.
See the recipe card for a full list of ingredients and measurements.
What maple syrup is the best grade for baking?
The best maple syrup for baking depends on how intense you want the flavor to be.
Maple syrup is graded by its intensity of color and flavor. Here are the current grading systems used by the US and Canada:
| Color & flavor | U.S. designation | Canadian designation | Best uses |
| Golden, Delicate Taste | U.S. Grade A Golden | Canada Grade A Golden | Drizzling over pancakes, waffles, yogurt, or ice cream where a mild maple flavor is preferred |
| Amber, Rich Taste | U.S. Grade A Amber | Canada Grade A Amber | An all-purpose syrup for the table, sauces, and baking |
| Dark, Robust Taste | U.S. Grade A Dark | Canada Grade A Dark | Baking and cooking, where a stronger maple flavor needs to stand up to other ingredients |
| Very Dark, Strong Taste | U.S. Grade A Very Dark | Canada Grade A Very Dark | Baking and cooking when you want the most intense maple flavor |
For these maple walnut scones, I recommend Grade A Dark, Robust Taste maple syrup. Its stronger maple flavor holds up well when mixed with the other ingredients without overpowering the scones. Grade A Very Dark, Strong Taste can also be used when you want an even more pronounced maple flavor.
How to make maple scones
Step 1: Mix the flour mixture
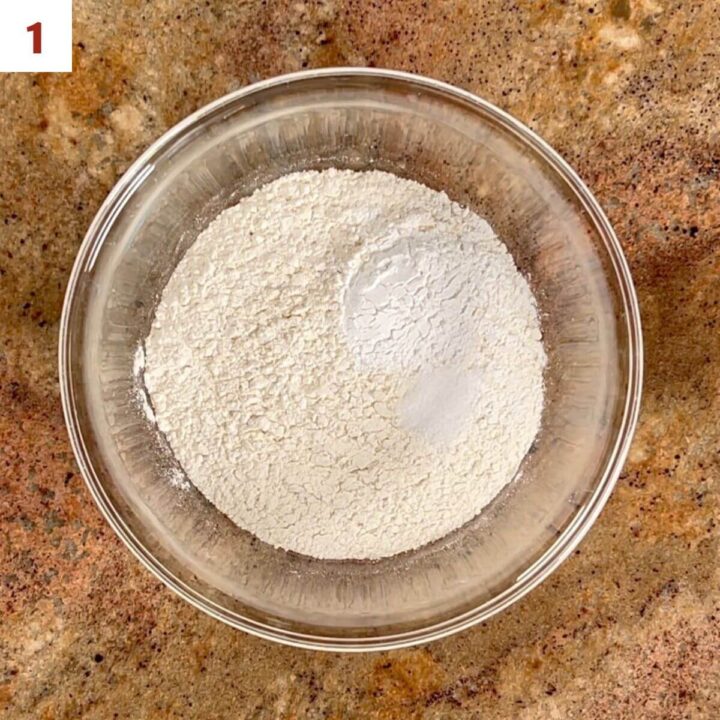
Whisk the flour, baking powder, and salt together in a large bowl (photo 1).
Step 2: Cut the butter into the flour mixture
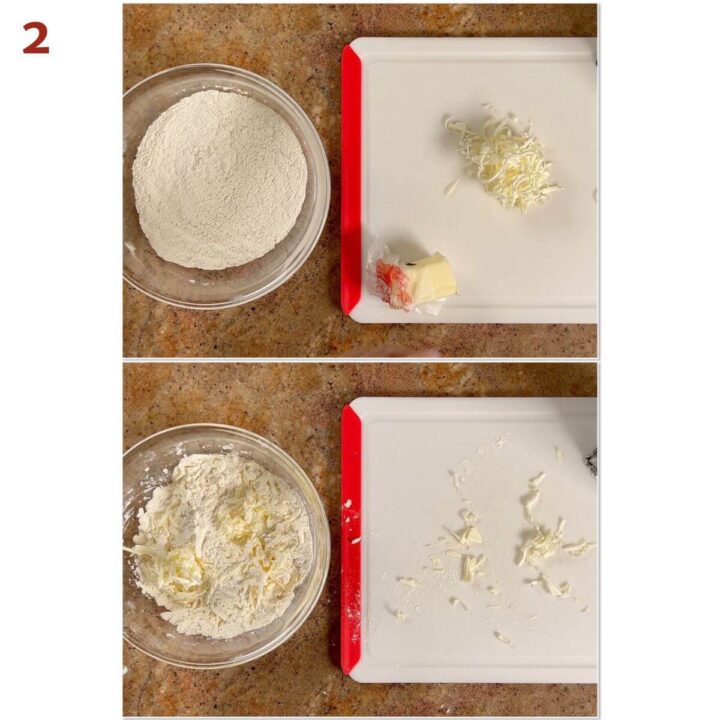
Grate the butter using a box grater and toss it into the flour mixture a little at a time (photo 2).
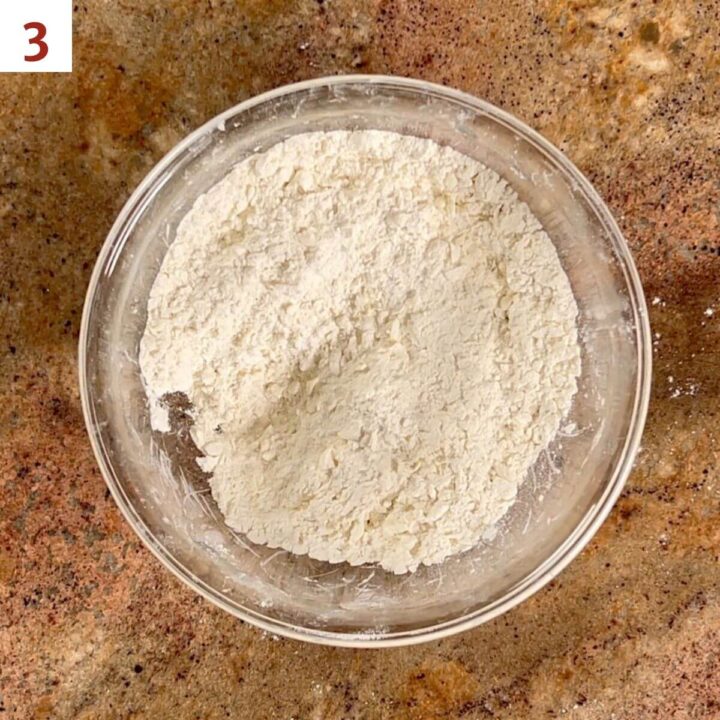
Use a pastry blender, two forks, or even your hands, to work the butter into the flour until coarse, pea-sized crumbs appear (photo 3).
Step 3: Chop the walnuts
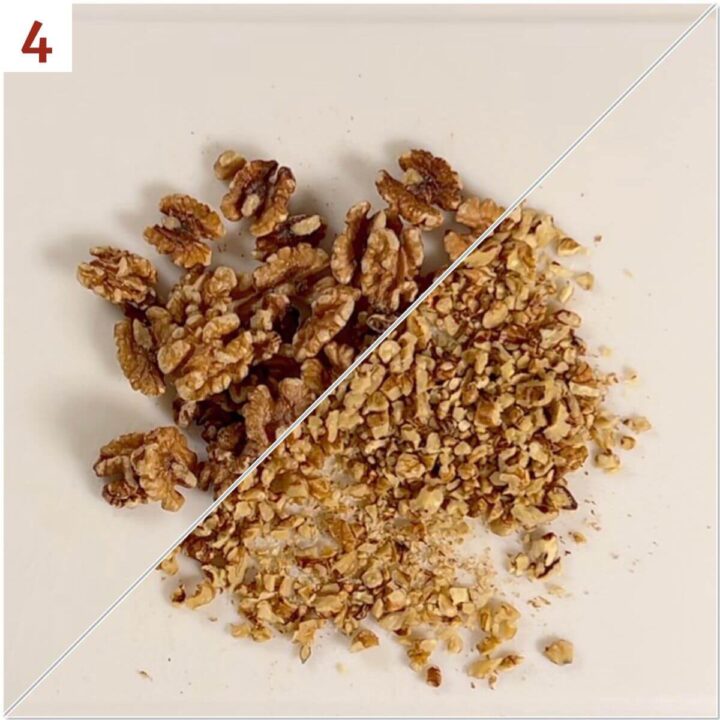
Here's a tip for the walnuts: since these are drop scones, you can chop the walnuts on the coarser side, but not too coarse - think medium (photo 4).
Step 4: Add the wet ingredients and the walnuts
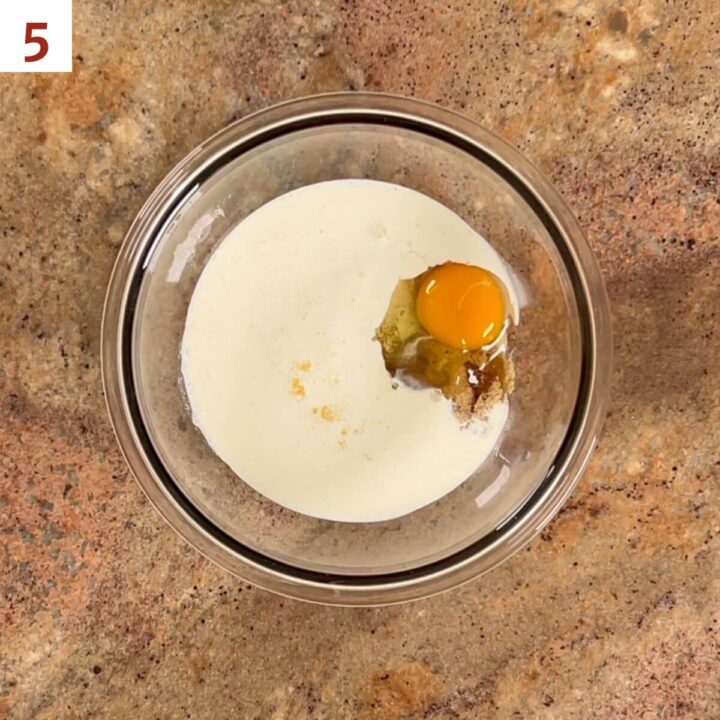
In a medium bowl, whisk the heavy cream, maple syrup, brown sugar, and egg together until no lumps remain (photo 5).
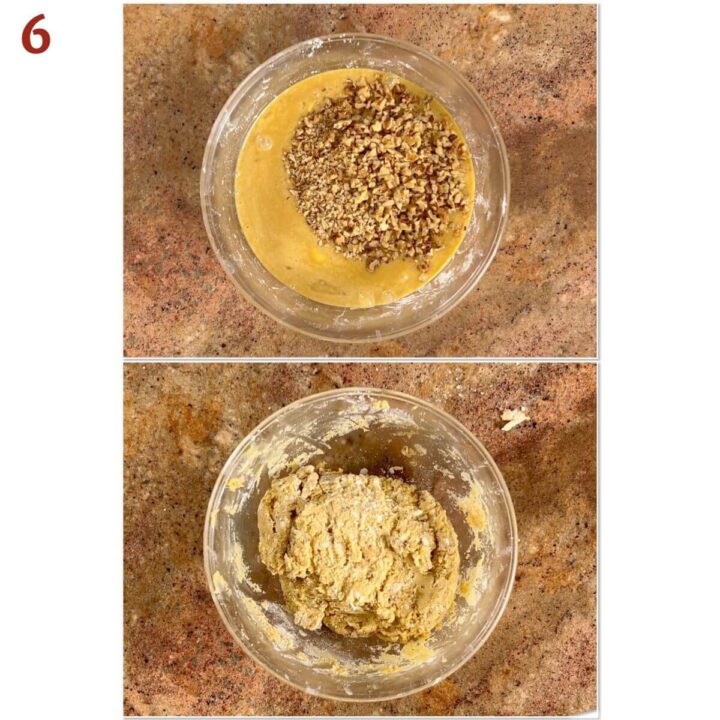
Pour the cream mixture into the flour mixture, add in the walnuts, and stir just until the dough appears moistened (photo 6).
Don't overwork the dough
To ensure that you get flaky scones, you should see little pieces of butter in the dough after mixing.
Making scones in the food processor
I've noticed as I've grown older that it's getting harder for me to make scone dough by hand, especially if I'm using frozen butter.
Using the food processor is a quick and efficient way to make scone dough, as long as you follow the #1 rule: Don't overwork the dough! Use short 5 to 10 second pulses to process the dough - you still want to see the chunks of butter after the dough is mixed. Here's a step-by-step breakdown:
- Coarsely chop the walnuts, pulsing a couple of times. Remove from the food processor and set aside.
- Pulse the flour, sugar, baking powder, and salt until it's combined.
- Add the cold butter to the flour mixture (½ at a time) and pulse a few times. Stop as soon as you see the flour mixture looking crumbly with pea-sized pieces of butter.
- Add the cream mixture and the chopped walnuts and pulse just until the dough holds together.
Now you're ready to turn out the dough and continue with the recipe.
Step 5: Bake the scones
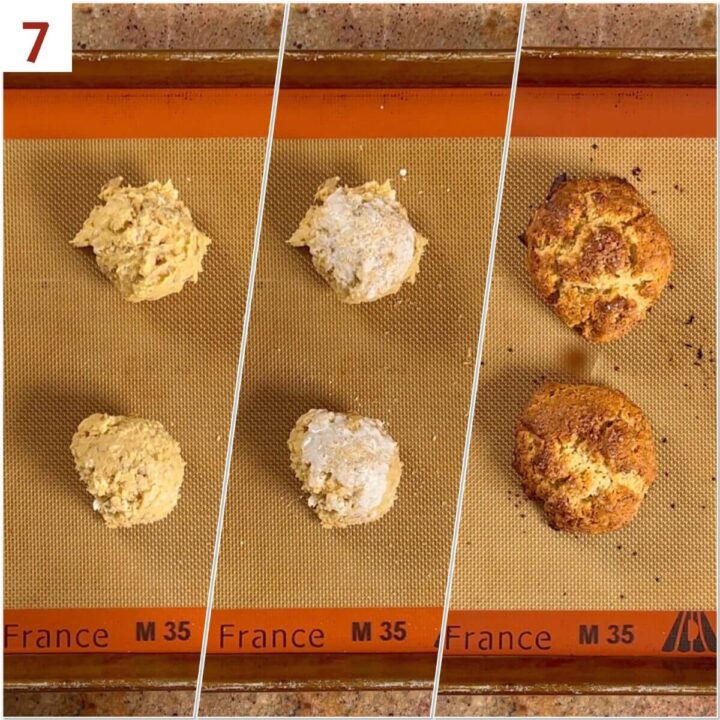
Portion out ¼ cup of dough using an extra large cookie scoop (or an ice cream scoop) onto a half sheet baking pan lined with a Silpat silicone mat or parchment paper.
After brushing the scones with heavy cream with a pastry brush and sprinkling them with coarse sugar (for extra crunch), bake them at 400°F for 18 to 23 minutes, until the tops are lightly golden (photo 7).
Step 6: Make the maple scone glaze
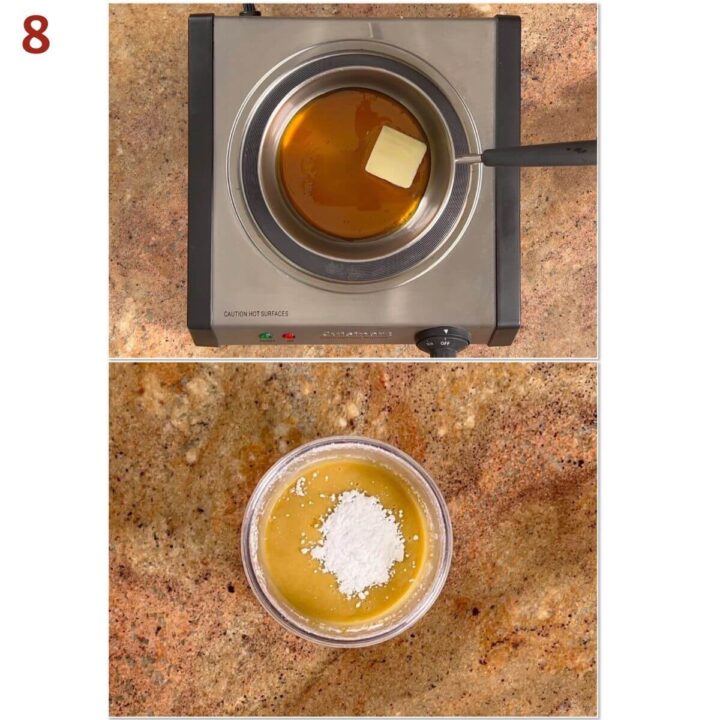
While the scones are in the oven, it's time to make the maple scone glaze.
Whisk the maple mixture into the sifted powdered sugar and stir until smooth (photo 8).
The mixture will be thick, but should still drizzle from a spoon (like the consistency of molasses). Adjust the icing's consistency with water or powdered sugar in ½ teaspoon increments as needed.
Step 7: Glaze the scones
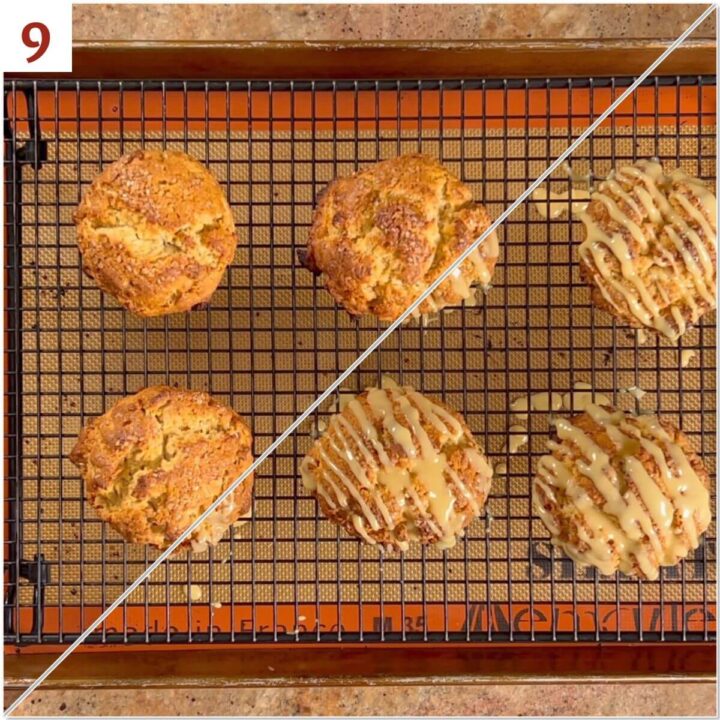
After the scones have cooled a bit, drizzle them with the maple scone icing and allow to set a few minutes (photo 9).
Storage and make-ahead instructions
Storage instructions: Maple scones are best enjoyed right away, though leftover scones keep well at room temperature or in the refrigerator for about 3 to 5 days. Glazed or plain scones freeze well, up to 3 months. Thaw overnight in the refrigerator then warm to your liking before enjoying.
Make-ahead instructions: For freshly baked scones anytime, freeze the scooped, unbaked scones in a ziplock bag. Take out as many as you want to bake (there's no need to defrost them first), and bake at 375°F for 20 to 25 minutes.
Troubleshooting tips
Here are some issues you might encounter when making Maple Walnut Scones:
- Scones are dry or tough: The dough was likely overmixed or had too much flour. Mix only until the dough holds together.
- Dough is too crumbly: Humidity can affect how much liquid the flour absorbs. Add heavy cream 1 tablespoon at a time, up to 2 tablespoons.
- Dough is too wet or sticky: Add flour 1 tablespoon at a time, up to 2 tablespoons. The dough should still be somewhat sticky.
- Scones spread too much: Make sure the butter stays cold and leave visible pea-sized pieces in the dough rather than blending it completely into the flour.
- Maple glaze is too thick or thin: Adjust with water or powdered sugar in ½-teaspoon increments until it's thick but still drizzles from a spoon.
- Maple flavor seems mild: Use Grade A Dark, Robust Taste maple syrup so its stronger maple flavor holds up better against the other ingredients.
Questions asked and answered
Here are some questions you might have...
Not at all! These maple walnut scones get their maple flavor entirely from pure maple syrup, so you don't need maple extract. For the strongest flavor, use Grade A Dark, Robust Taste maple syrup, which has a more pronounced maple flavor than lighter grades.
Pure maple syrup is recommended for these scones because it provides the maple flavor the recipe is designed around. Pancake syrup is a different product, usually made primarily from corn syrup with added flavoring, so I haven't tested it as a substitute here.
Didn't find the answer you're looking for?
Ask AI to answer for this specific recipe:
Disclaimer: I am not responsible for the quality of AI information

I hope you like this recipe! Let me know if you have any questions, and don't forget to leave a comment and rating. Thanks!
Slainté! L'chaim! Cheers!
- Tammy
More biscuit and scone recipes to try

Recipe
Glazed Maple Walnut Scones
Equipment
- extra large cookie scoop (4 tablespoons) or an ice cream scoop
Ingredients
For the scones
- 2½ cups all-purpose flour
- 1 tablespoon baking powder
- ½ teaspoon kosher salt
- ½ cup unsalted butter, cold, grated or cubed, see Recipe Notes
- ½ cup heavy cream, plus more for brushing on top of scones
- ⅓ cup pure maple syrup, Grade A Dark, Robust Taste
- ¼ cup brown sugar, packed, light or dark
- 1 large egg
- 1 cup walnuts, chopped into medium-sized pieces
- coarse sugar, for sprinkling, optional
For the maple glaze
- 3 tablespoons pure maple syrup, Grade A Dark, Robust Taste
- 1 tablespoon butter, unsalted
- ½ cup powdered sugar, sifted
Instructions
- Preheat oven to 400 °F. Line two half sheet baking pans with a Silpat silicone mat or parchment paper. Set aside.Note: The instructions below are for making the dough by hand. If you want to use the food processor to make the dough, see the instructions in the post above.
- Make the scones: In a large bowl, whisk 2½ cups all-purpose flour, 1 tablespoon baking powder, and ½ teaspoon kosher salt together.
- Toss ½ cup unsalted butter into the flour mixture to coat, then use a pastry blender, two forks, or your hands to work the butter into the flour mixture until coarse, pea-sized crumbs appear. Don't overdo this step as you don't want the butter to warm up and mix completely into the flour.
- In a medium bowl, whisk ½ cup heavy cream, ⅓ cup pure maple syrup, ¼ cup brown sugar, and 1 large egg together until no lumps remain.
- Slowly add the cream mixture with 1 cup walnuts (chopped) to the flour mixture and mix until the dough just holds together. Using a bowl scraper will help to combine the dough in the bowl without your hands warming up the butter, plus you can see any crumbs at the bottom that still need to be mixed in. Remember, do not over mix the dough - you want to keep that butter cold and separate from the flour.The amount of liquid to add to the flour mixture depends on the humidity of the day. Squeeze a small amount of dough between your fingers, and add more heavy cream or flour, 1 tablespoon at a time (2 tablespoons maximum), if it's too crumbly or too wet.
- Using an extra large cookie scoop (or an ice cream scoop) to portion out ¼-cup mounds of the dough onto the prepared baking pan at least 3 inches apart. You might need to use a spoon to help get the dough out of the scoop. The dough will be sticky and a little wet.
- Brush scones with cream, then sprinkle with coarse sugar if desired.
- Bake scones for 18 to 23 minutes, rotating pans after 10 minutes, until the tops are lightly golden. Remove the scones from the oven and let them cool for a few minutes.
- Make the glaze: Heat 3 tablespoons pure maple syrup and 1 tablespoon butter together in a small saucepan over low heat, whisking occasionally. Once the butter has melted, remove from heat and let the mixture cool for 3 minutes.
- Whisk the maple mixture into ½ cup powdered sugar (sifted) and stir until smooth. The mixture will be thick, but should still drizzle from a spoon (like the consistency of molasses). Adjust the icing's consistency with water or powdered sugar in ½ teaspoon increments as needed.
- Drizzle the glaze over the still warm scones and let the glaze set about 10 minutes (if you can wait that long!). Serve & enjoy!
- Storage Instructions: Scones are best enjoyed right away, though leftover scones keep well at room temperature or in the refrigerator for about 3 to 5 days. Glazed or plain scones freeze well, up to 3 months. Thaw overnight in the refrigerator then warm to your liking before enjoying.
- Make-ahead instructions: For freshly baked scones anytime, freeze the scooped, unbaked scones in a ziplock bag. Take out as many as you want to bake (there's no need to defrost them first), and bake at 375 °F for 20 to 25 minutes.




Doris says
I am going to try making these for a breakfast women's group. Can I make mini-ones? Should I just cut the baking time in half?
Tammy Spencer says
Hi Doris, Mini scones are a great idea! Depending on the size you choose to make them, I’d start checking at the 12 to 15 minute mark (the smaller they are, the less time they’ll need). Good luck, and happy baking 😉
Amanda C says
I made these and they are so delicious! I forgot to add the walnuts to the dough and didn't brush with cream and they still turned it amazing! My scones turned out light and fluffy and so good my husband and I are trying really hard not to eat them all!
Tammy Spencer says
Hi Amanda, I’m so glad you liked them. Thanks for sharing, and happy baking! 🙂
Beth H says
Love, Love, Love maple walnut anything... lol Will be trying these very soon. I found by accident that the missing ingredient from many maple walnut recipes is the molasses in the brown sugar. Adds that so meting special. Thank you for sharing the recipe.
Tammy Spencer says
Hi Beth, Thanks for sharing. Happy baking! 🙂
Amy Grace says
I saw your Instagram post about making these for New Years Day and decided to give it a try. My family loved them!! What a great way to start the year. Happy new year to you, Tammy!
Ella says
Delicious!